Aws is currently the world leader in cloud computing. In a matter of minutes, You can provision your entire infrastructure globally with AWS.
AWS Infrastructure spans 77 Availability Zones within 24 geographic regions around the world. You can scale up websites, app, or infrastructure with a click of a button.
Prerequisite
A registered AWS account that has access to lightsail.
What will you learn from this tutorial?
We will be Creating a Plesk Server(web hosting and server data center automation software ).
Why Plesk? Easy-to-Use. one click away Web & App hosting. One Dashboard. An innovative control panel for managing servers and scaling hosting businesses. Intuitive Control Panel. GIT Integration. DOCKER Support. if you are into those. More importantly plesk is a GUI based web server control panel.
We will be installing a WordPress website with the help Plesk
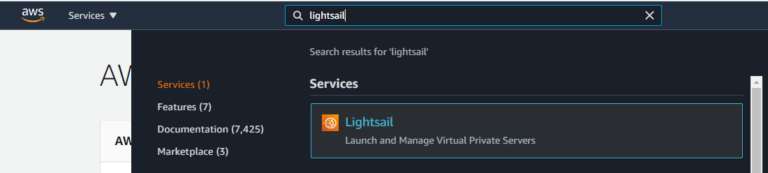
1.Sign in to your AWS account and Navigate to Lightsail
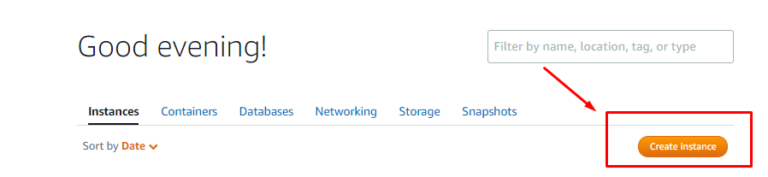
2.Click Create instance
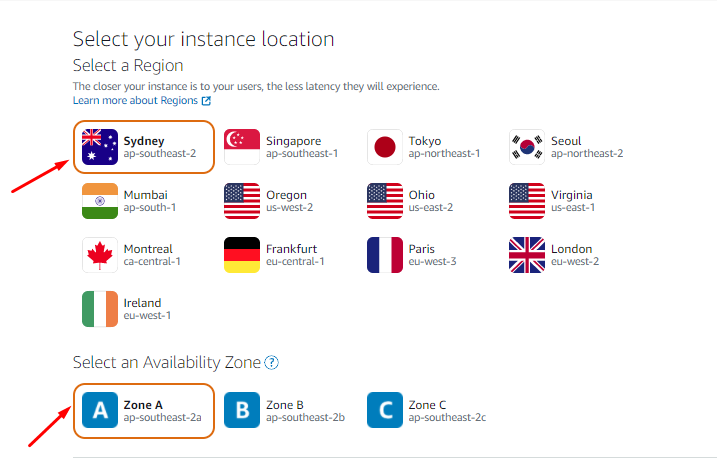
3. Choose your instance location, I choose Sydney, Zone A (ap-southeast-2a) as its my nearest AWS Region and Availability Zone
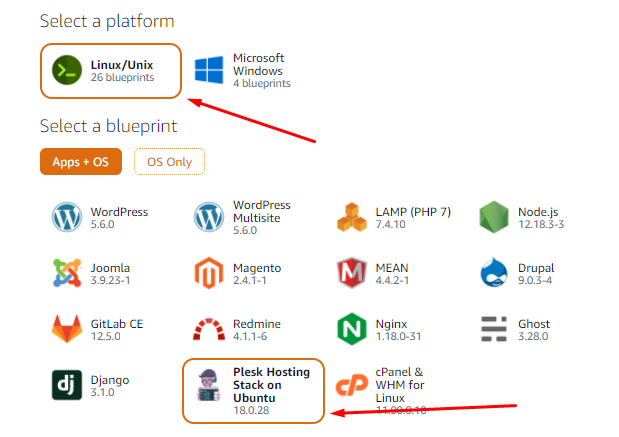
4.Choose your operating system (preferably Linux as it is cheaper) and Select Plesk
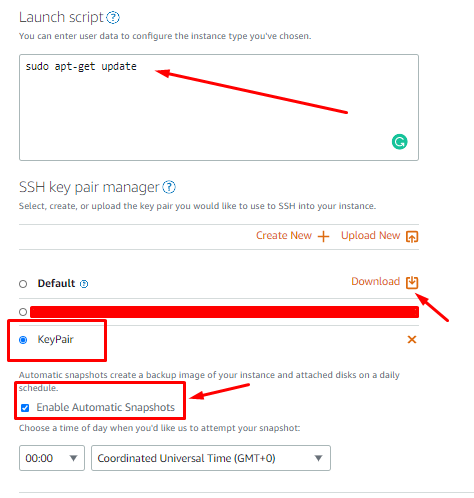
5.Adding launch Scripts and download SSH Key
You can add custom scripts in case you want to automate some Admin area while launching the server. Also make sure you download the SSH Keypair (key used to SSH into Server) and enable snapshot for automated backup the server.
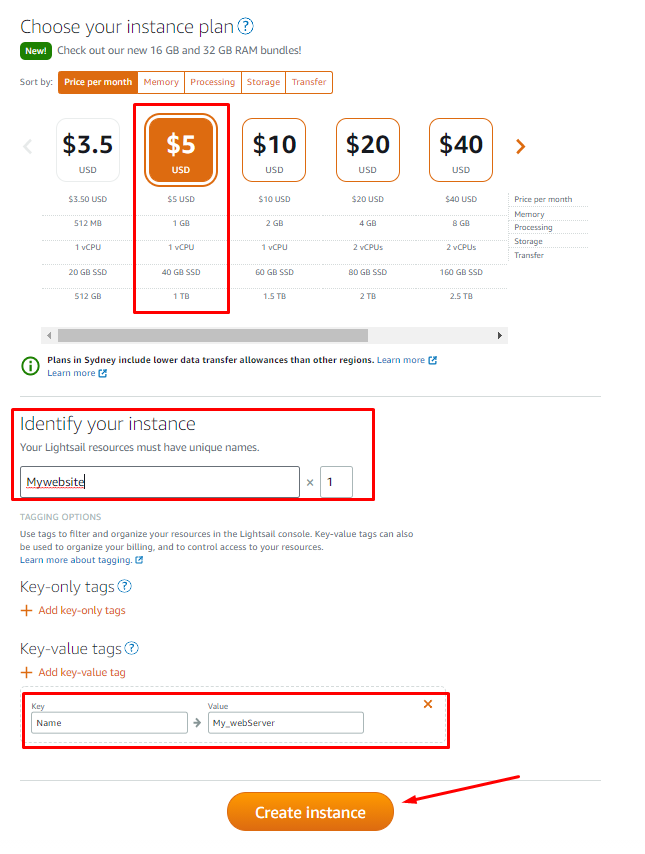
6.Selecting your server
Select your plan according to your need. You can also Name your LightSail Instance here for identification purpose. Key Value Tags help us to Manage the instance Smoothly. (not Mandatory but highly recommended). Now click Create instance
7.Go to your lightsail dashboard, Now you can see your instance is cooking. Once done, click and enter.
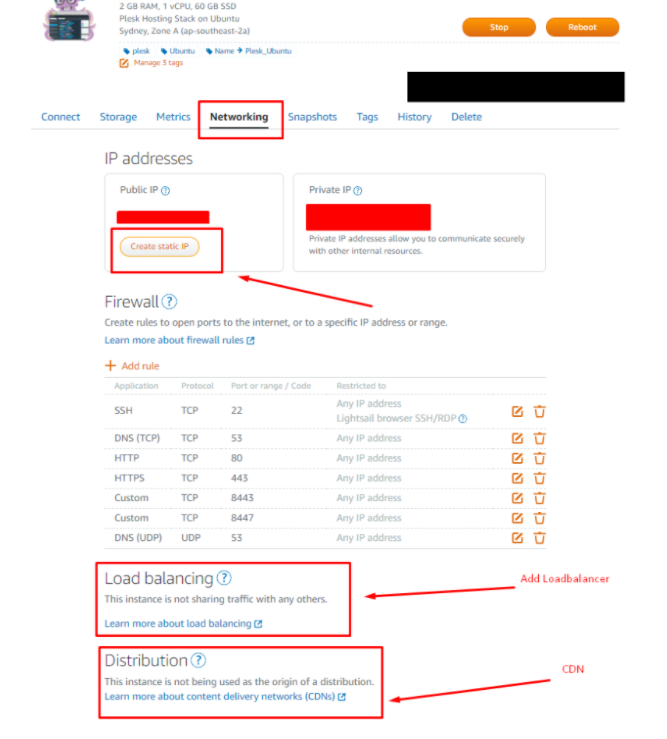
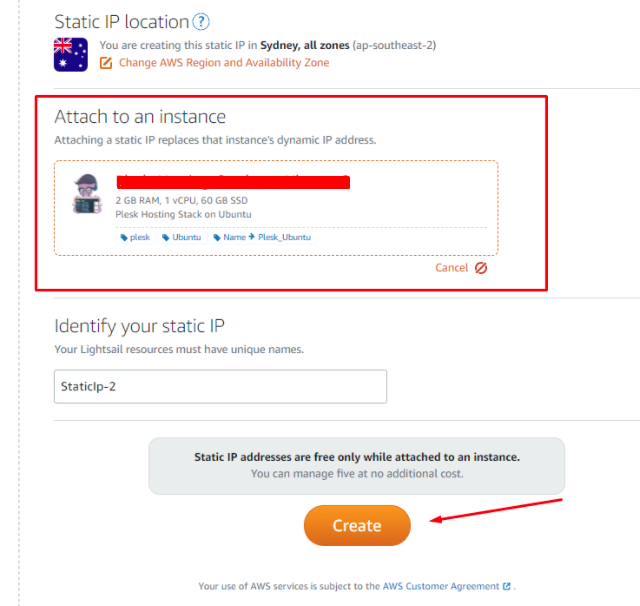
8.Assign a static IP
Now we need to assign a static ip for ec2. Reason: when every time we reboot the instance it will to be assigned with a new ip, this is going to be a problem . Click on Create new static IP and attach the instance and create new static ip address. Go back to instance and reboot the system
9.Now Plesk Setup
Click on to Connect using SSH -Enter:
sudo plesk login | grep -v internal:8
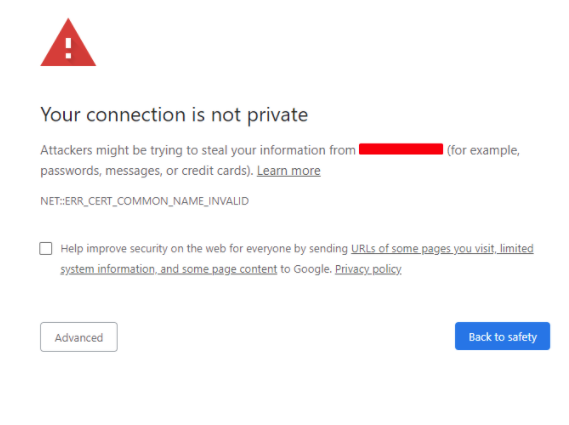
It will Create two links for first time login of the admin panel. Copy and paste it to a browser
If you are using google chrome, you probably get something like this. Click on advanced and Proceed to unsafe ip. Reason for this warning msg is because no ssl certificate assigned yet
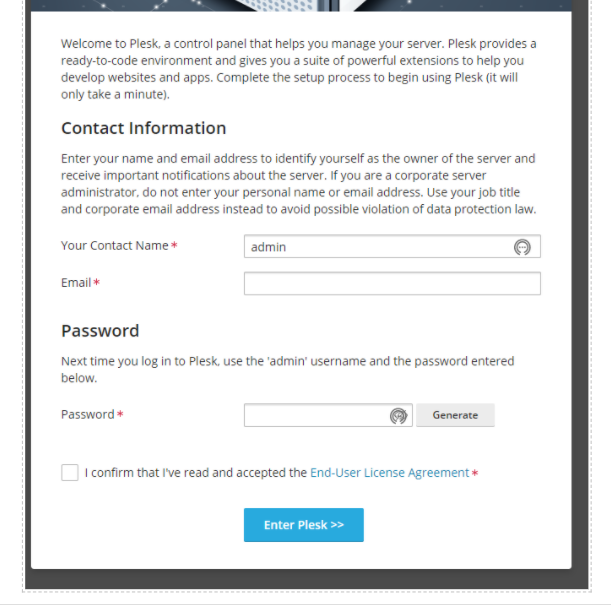
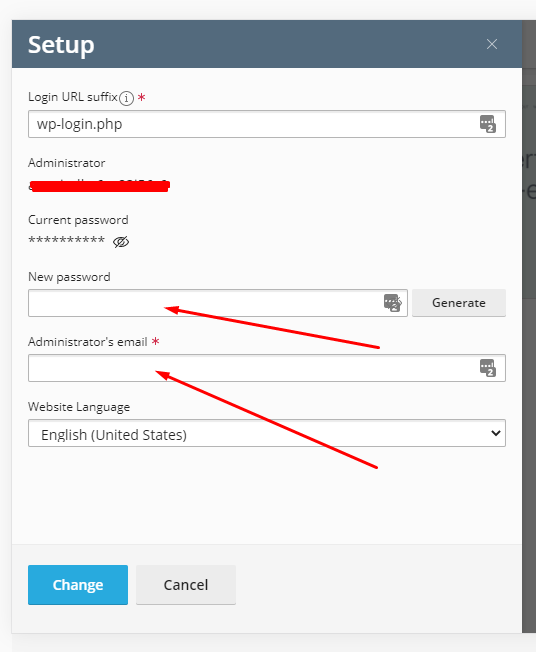
10.Enter a admin username, email and password and click Enter Plesk and Wait for Plesk to do the initial setup.
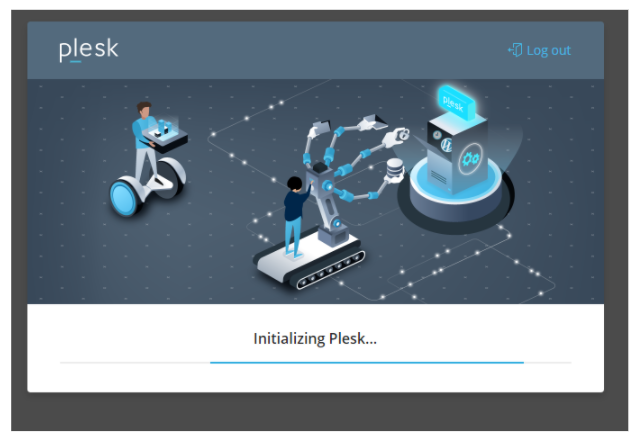
10.TADAAAAAAA
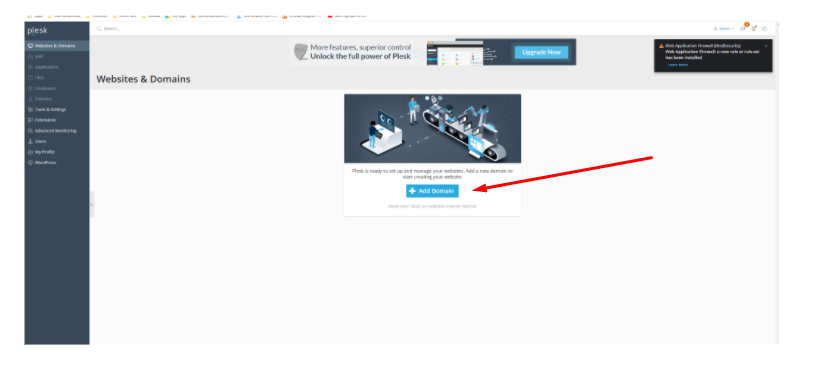
You are good to go Now, let’s add our domain.
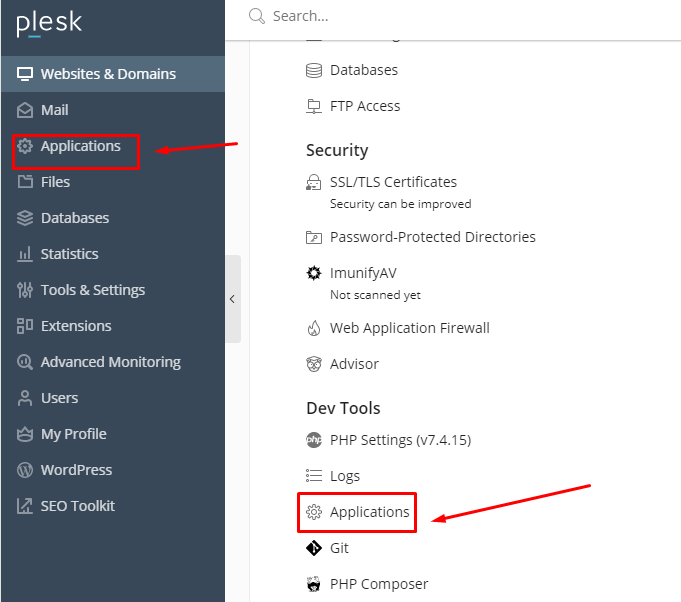
11. Now goto the Applications section and select your domain then click to Applications
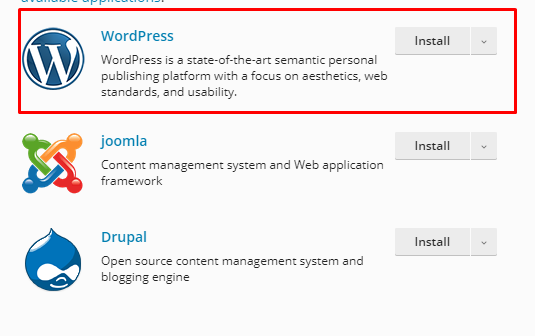
12.Click your desired platform , here we will select WordPress for demo purpose
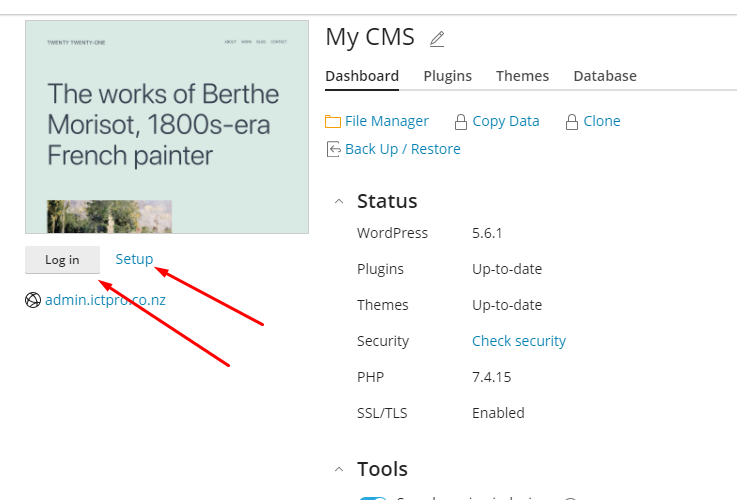
13.Once installation is complete setup a username and password for admin to login and then click login.
Hurray , we successfully created a WordPress website in AWS