DAY 31- Deploy Containerized Applications with ECS – Day Thirty One

100 days of Cloud on GitHub – Read On iCTPro.co.nz – Read on Dev.to
Get the app
Here Iam using a website with nginx server to deploy on a container with the help of ECR.
Let’s get the data
git clone https://github.com/anuvindhs/CLOUD-is-AWSome.git
Docker
Building a docker file
- Lets build our NGINX docker file for our website.
- once you have created the docker file inside the folder, copy-paste the below commands
FROM nginx:latest
COPY ./ /usr/share/nginx/html/
- I am using VScode, check below to understand the folder structure
AWS Permissions - Make sure you have programmatic access via AWS CLI
- Full permissions to ECS & AmazonEC2ContainerRegistryFullAccess
ECR
Create a repository
- Goto ECR from AWS console and create a repository
- Create a ECR repo ,i have named mine
webapp-ecr-repo
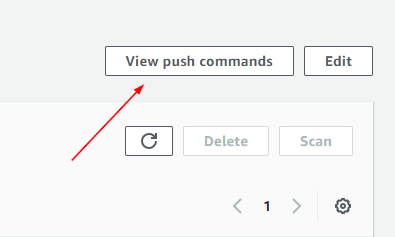
Login to ECR
if you open the repo, on the right-hand side you can see an option for view push commands.
Now using AWS CLI login to ECR
aws ecr get-login-password --region xx-xxxxxx-xx| docker login --username AWS --password-stdin xxxxxxxxxx.dkr.ecr.xx-xxxxxx-xx.amazonaws.com
Build the docker image
docker build -t webapp-ecr-repo .
Lets tag our image with repo name
docker tag webapp-ecr-repo:latest xxxxxxxxx.dkr.ecr.xx-xxxxxx-xx.amazonaws.com/webapp-ecr-repo:latest
Lets push the image to the repository
docker push xxxxxxxxxx.dkr.ecr.xx-xxxxxxx-xx.amazonaws.com/webapp-ecr-repo:latest
if you are using PowerShell on windows please use windows commands to push the image to the repo.

ECS
Create a cluster
- Goto ECS dashboard and click Create Cluster.
- select EC2 Linux + Networking
- Enter Cluster name & EC2 instance type , am keeping it to t2.micro.
- Select the default VPC and Subnets available.
- Also enable Auto assign public IP
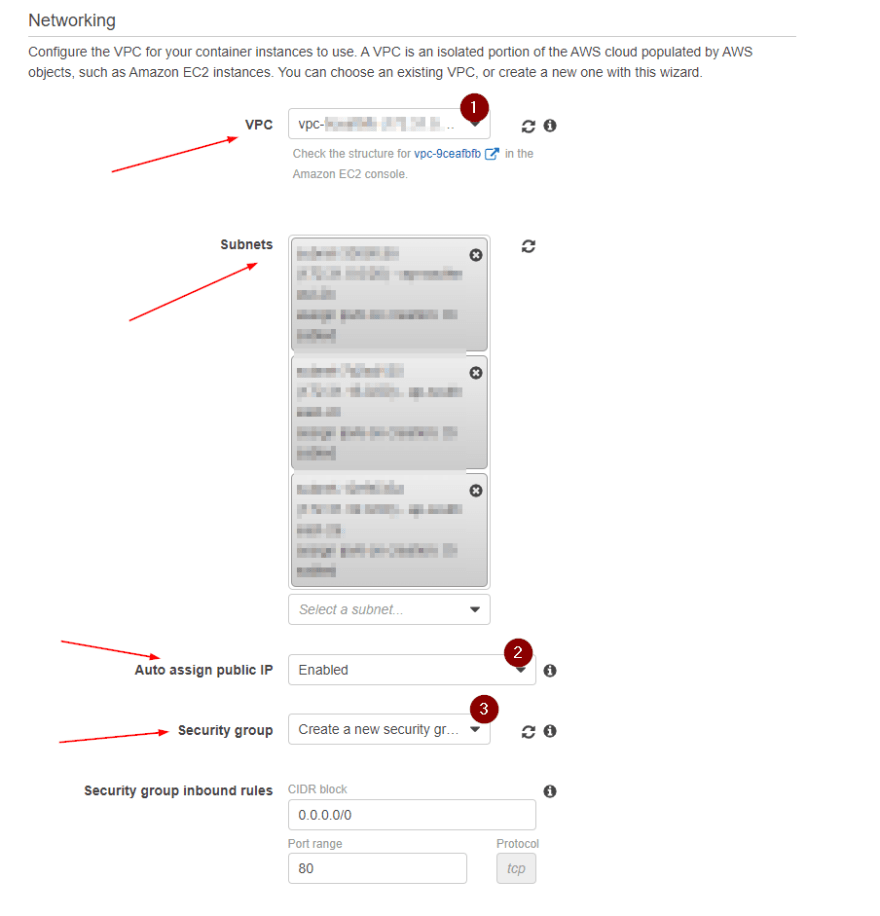
- you can use default Security group or create a new one or can attach a Security group which is already created.
- Now click Create

Creating Task Definition
- Click on create Task Definition & then select EC2

- I am naming mine as
Taskdef-webapp-ecr - Update Task memory to 128 and Task CPU to 1 vCPU, then click Add Container
- Add a name, mine is
container-webapp-ecr - Copy your ECR repo URI from the repository and update that on the image coloumn
- Map your ports, here its 80:80 ,
- Now add, and create the Task definition.
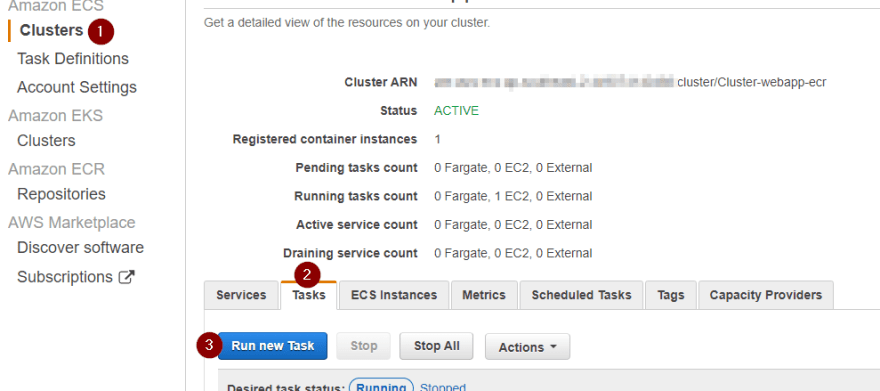
Run the Task
- goto Clusters, select Task then click Run New task
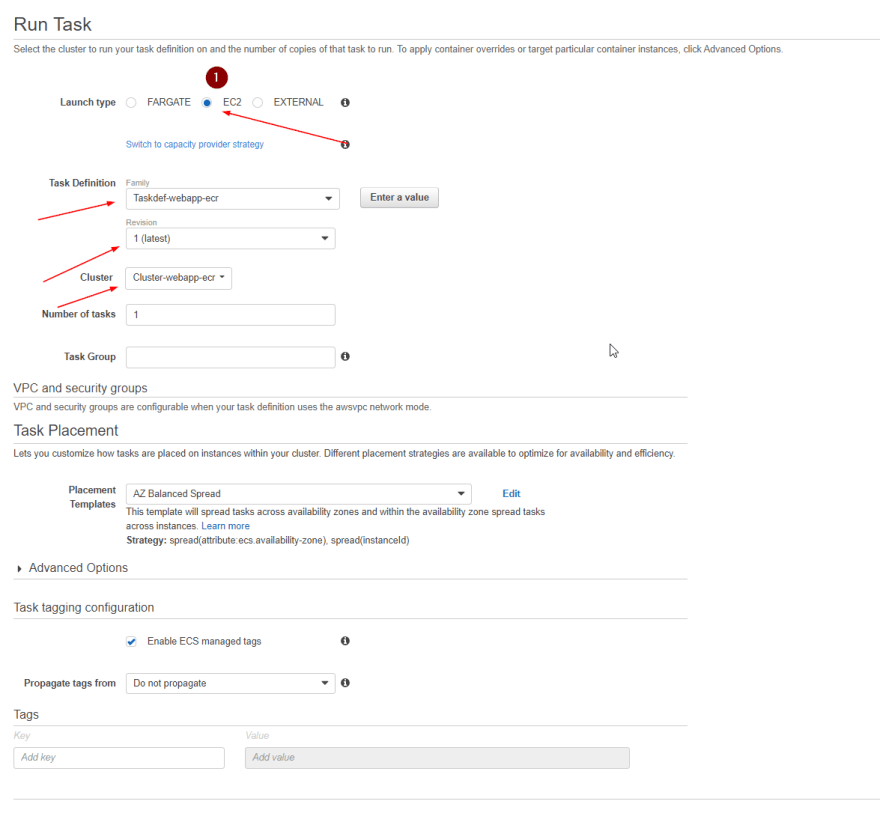
- Select EC2
- Select out Task Definition we created.
- Select our Cluster
- leave everything default and click Run Task
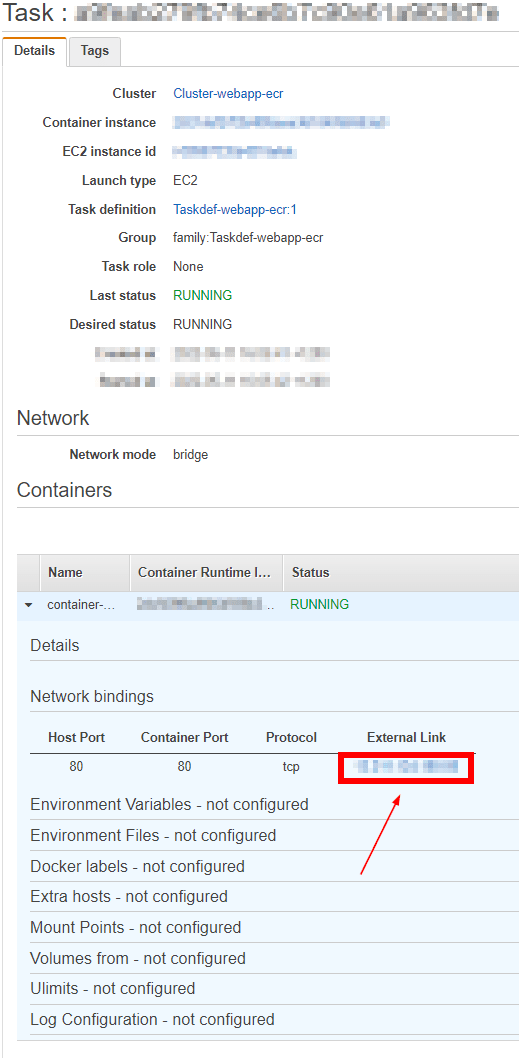
Once the Task is created you will be able to see a Running Status
if you navigate to external Link you will be able to see the live website.
Congratulations, now you have successfully configured a docker image which you have pushed to ECR and Deployed on a container with ECS.
✅Connect with me on Twitter
🤝🏽Connect with me on Linkedin
🧑🏼🤝🧑🏻 Read more post on dev.to or iCTPro.co.nz
💻 Connect with me on GitHub

