+1
+1
+1
+1
+1
DAY 24 – Securing your Load Balancer with CloudFront – Day Twenty Four


100 days of Cloud on GitHub – Read On iCTPro.co.nz – Read on Dev.to
Restrict your LoadBalancer’s public access, let internet have access to your app only via CloudFont.
Prerequisite
- Understanding of how LoadBalancer work.
- Your app delivering content via CDN from LoadBalancer.
- Application Load Balancer with at least one listener.

Tutorial
Updating Rules
As of now I believe you have at least configured Listeners for your Load Balancer.
lets update the rules for the listener
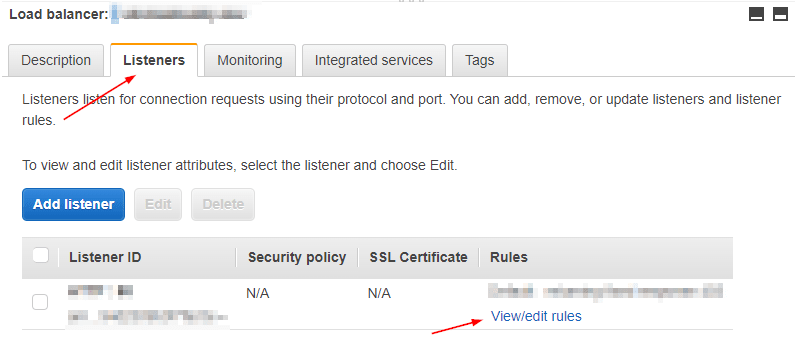
- goto LoadBalaner from EC2 dashboard and select your LB.
- Then Select listeners and Click View/edit rules
- Select edit
- Delete the current forward to , and click add actionthen Return fixed response….
- Response code = 403 , Content-Type = text/plain , Response body = Access Denied , Now click the tick mark and update.
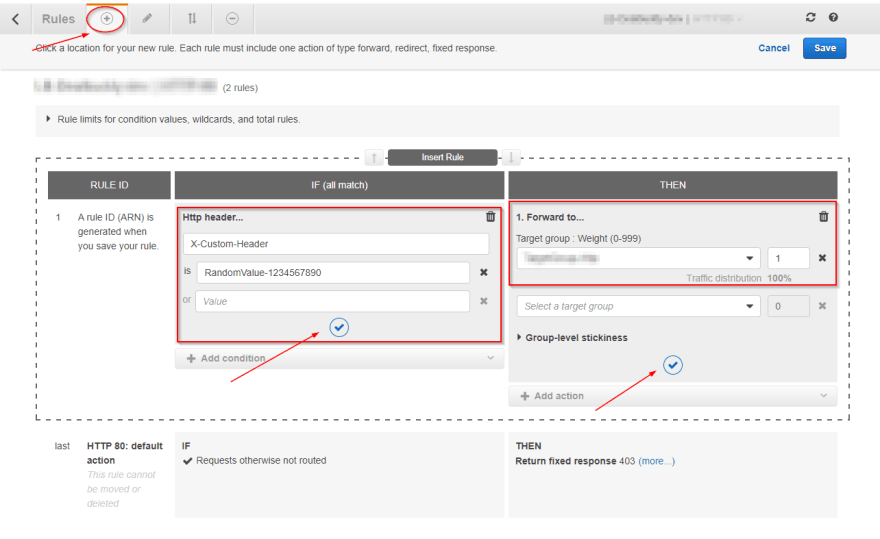
Custom header rule
In this stage we create a Custom header.
- Goto + and click Insert Rule.
- Add condition as Http header.
- add X-Custom-Header as header Header name, give a random unique value RandomValue-1234567890.
- Now foward this to your TargetGroup
- Now Save it.
Update the CloudFront -CDN
- Goto CloudFront console and select your distribution.
- Select Orgins and click edit.
- Under Add custom header – optional
- Update Header name =X-Custom-Header , Value=RandomValue-1234567890 and click Save
🎉Congratulations🎉 you have successfully secured your load balancer.GIF
✅Connect with me on Twitter
🤝🏽Connect with me on Linkedin
🧑🏼🤝🧑🏻 Read more post on dev.to or iCTPro.co.nz
💻 Connect with me on GitHub

