+1
+1
+1
+1
+1
3 Ways to geo-restrict your App – Day Nineteen

100 days of Cloud on GitHub – Read On iCTPro.co.nz – Read on Dev.to
In this tutorial i will show demo of , restricting your application to specific country.
📝Prerequsite
Access to your WAF, Cloud Front, Route53 and privileges to manage it
🌩️ Using CloudFront
- Login into Console and goto CloudFront

- Select your cloud front Distribution
- Go to Geographic Restrictions and select edit

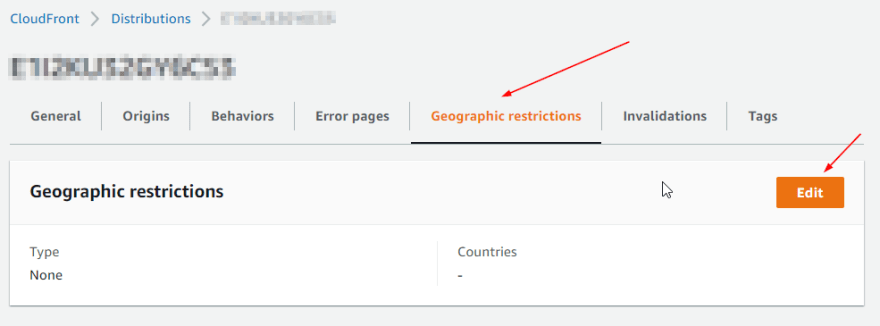
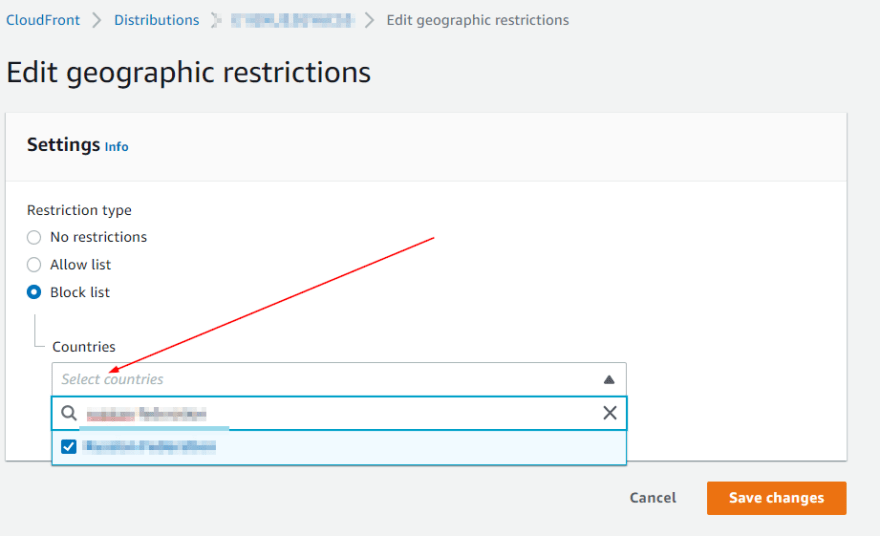
Select Block list, and type in the country you want to restrict. and click Save changes
🛡️ Using WAF & Shield
- Login to console and go to WAF & Shield

- Select your Web ACLs and go to Rules. Then Click Add my own rules and rule group
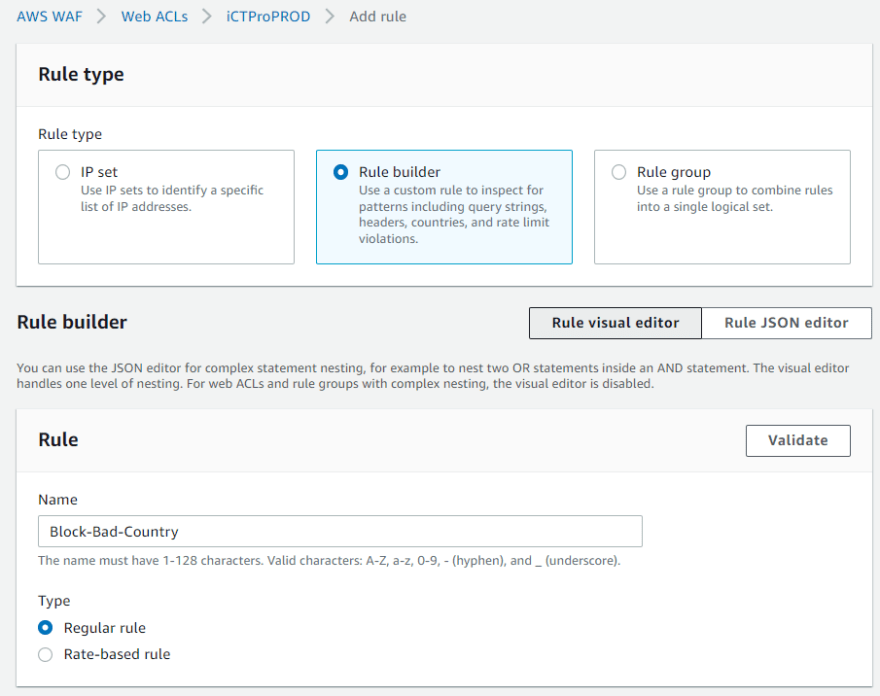
- Select Rule Builder and Name the rule.
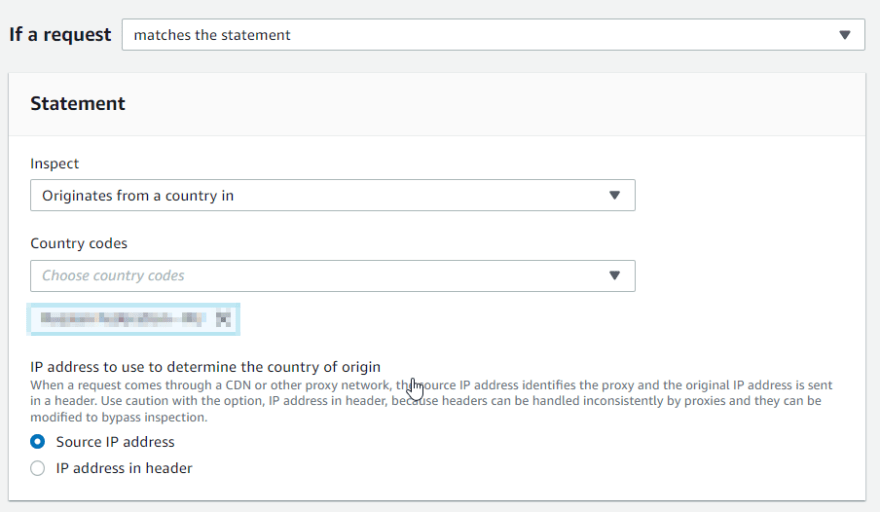
- Select inspect as Originates from a country in and type the bad country you want to restrict access.
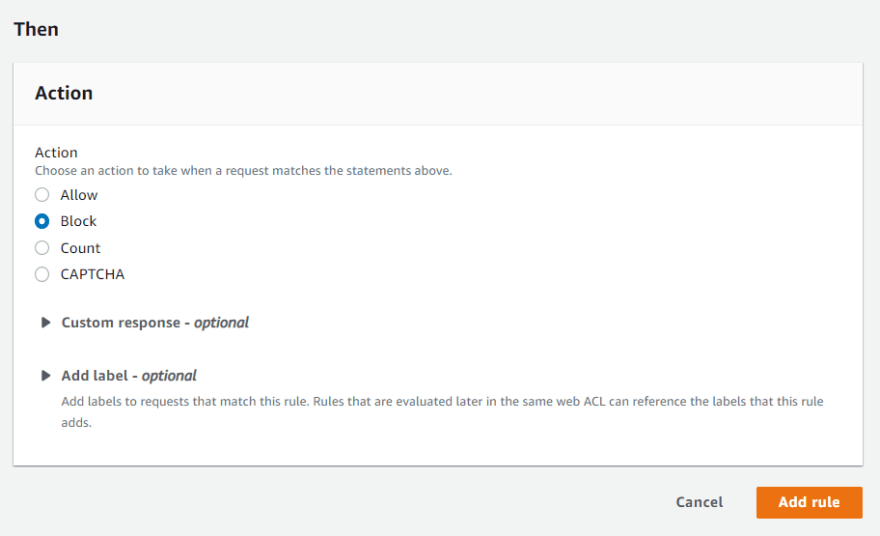
- Then select Action as Block then click Add rule.
🛣️ Using Route53
- Here the concept is a bit different rather than blocking them completely , what route53 does is it will redirect traffic from selected country to a diffrent end point which can be an s3 hosted site which says ” You don’t have access to this website from your country”.
- Check out this Tutorial to see how can you create a website with s3.
- once you host your site on s3 for the Bad-Country , you can just point it with R53.
- Login into Console and goto Route53.

- Click on to your Hosted Zones and select Traffic policies.
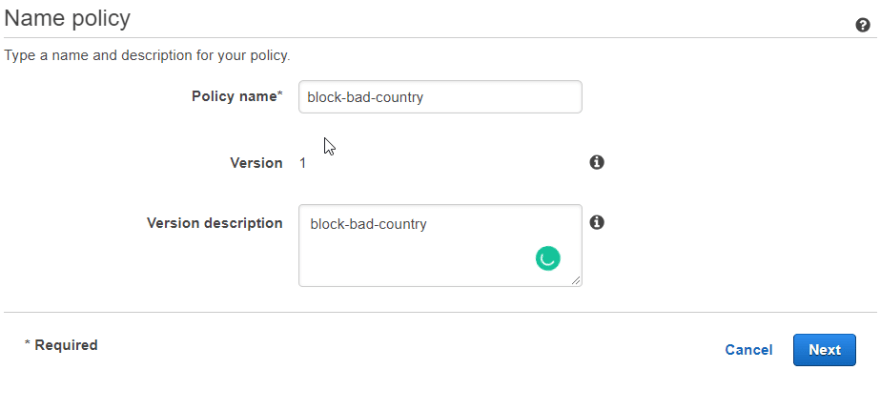
- Enter information as shown below. and click Create Traffic Policy
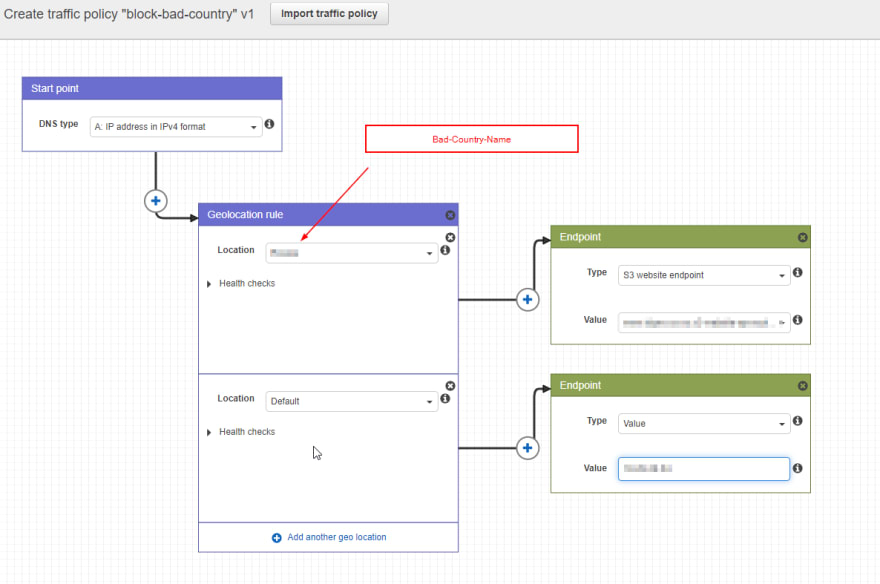
Select your Domain and Click Create Policy Records
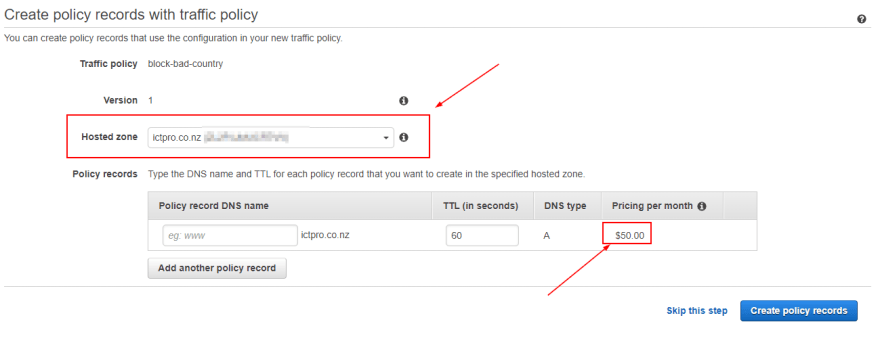
Remember there is $50 charge for this so its recommended to use first two options
🎉Congratulations🎉 you have successfully blocked access to your app for a unauthorised Country.
✅Connect with me on Twitter
🤝🏽Connect with me on Linkedin
🧑🏼🤝🧑🏻 Read more post on dev.to or iCTPro.co.nz
💻 Connect with me on GitHub


